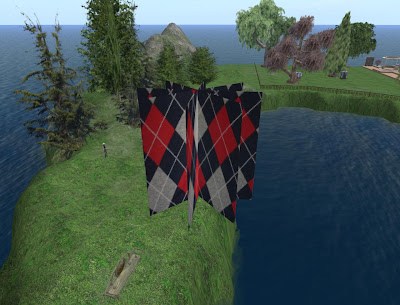
I thought I'd update you on my progress in that long strange adventure I've been on in Blender. If you haven't read it I suggest you refer back to Part One on this topic. Remember I'm not an expert on Blender but sharing my journey gives me an excuse to take a break from it. :)
It has taken an obscene amount of time but I finally created the shape I want in Blender and successfully uploaded it to SL. I still need to fuss with baking textures but for the moment I'll be happy with a large argyle thing. I can tell you (if you're planning to embark on the Blender adventure) that it's a lot easier to do stuff once you know the way Blender works. That sounds obvious but learning the shortcuts and the keyboard functions makes a huge difference.
One of my objectives was to make a sculpty that doesn't lose its shape when you move away from it. This one holds its shape at more than 100m which makes me happy. I'd like to be able to put out trees that don't dissolve into a blob a few steps away.

Of course this means learning all about "LOD" and understanding what you have to do to achieve the effect you want.
"LOD" stands for "Level of Detail". For the purposes of Second Life you care about "LOD x size x distance". It doesn't matter how detailed you've made your sculptie, as your distance from it increases the number of vertices visible to you decreases. The larger the object the more distance required before the vertices start to disappear.
Machinimatrix has a lot of good videos and the one on LOD is well worth watching but I'll give you a brief overview here.....
- You want to create a shape that is visible with as few vertices as possible - so one that looks right from a distance.
- However, you also want to create a shape that (if it has edges) is sharp and detailed. This requires more vertices.
- So you will give up sharpness and detail at a distance but you want to maintain the basic shape.
- To do this in Blender you use MultiRes. This is a function (supported by Jess and Primstar) which allows you to increase the number of vertices for the purposes of creation and yet test that you've maintained the shape with fewer vertices. Sounds like bafflegab I know but it does work.
To illustrate MultiRes I've added a cylinder mesh in Blender at Level 1 with 32 x 32 vertices. This size will give you the 64x64 pixel size you want for SL.

If I add a MultiRes level to 2, the number of vertices is increased.
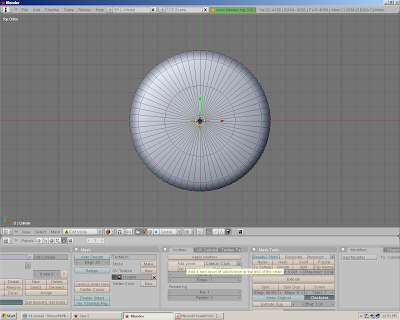
At level 3 we've multiplied the number of vertices about as far as you'd need to go.
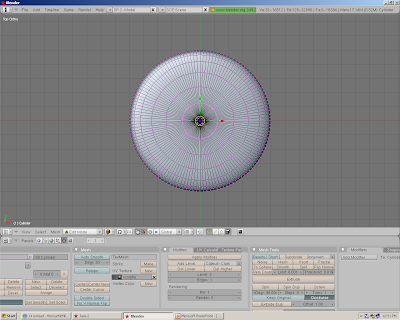
The video I mentioned will explain this much better than I but there are a couple of important points you should note which might not be clear.
- Everything in Blender means something - including the colours of the dots on the vertices. As you increase the MultiRes levels you'll notice that some of the dots are pink and some are yellow. The yellow ones are vertices which still appear at lower MultiRes levels. This is important. Note that the colour differences will disappear when you start editing so make sure you know where they are and lower your level to 1 periodically to check.
If you create a masterpiece which requires visible vertices that only appear at Level 3 you're screwed unless you only want your brilliance visible from 1m.
- If you're wondering why you'd bother with this (editing your shape at Level 3 even though you are aiming for something visible at Level 1) extra work - it's because it will increase the clarity and sharpness of the object's shape at all levels.
- Whatever we do on the computer we're told to save our work as we go. Blender is the reason why we've been trained to do this. I cannot count the number of times a day I say "How the %*&^^ did I do that?" and have to start again.
I'm going to work on texture baking. Good Luck to you!


